Showing posts with label craft. Show all posts

Friday, June 27, 2014

DIY Tutorial: Newspaper Poms

Happy Friday beauties! I'm so excited to share with you some news. +Amy Anderson from +DIY Candy has asked me to contribute craft tutorials for her site DIY Candy!! It's been an amazing experience so far and I'll be sharing with you all some of the fun things that's been happening. Today I'm bringing you a beyond easy newspaper craft: poms! You must have a bundle of unused newspapers somewhere. Here's how you can turn a few sheets into a cute pom masterpiece.


Here's what you'll need:
  • 4 - 6 sheets of newspaper
  • string or twine
  • scissors 
Lay the newspaper sheets flat on a tabletop.


Fold over the newspaper about an inch, starting from the bottom. Continue folding front to back like you were creating a paper fan. 


Cut the folded newspaper in half using your nifty scissors.

Cut a piece of string and tie it around the center of the folded piece of newspaper. Secure with a knot.


Gently peel away the outer newspaper layers while holding it in one hand. To create a sort-of floral effect, separate each newspaper layer from the other.


Hold the center of the folded newspaper and repeat the process on the other side. Continue to separate the layers until you see the shape of the pom you like. Pull and crunch the newspaper to the form you want. This may take some time as you perfect your newspaper pom.

Now hang 'em up and behold the awesomeness! I have a few hanging in my studio and they are adorable. This would also make a really cool summer craft with the kiddos if your stuck indoors one day. I want to try and make mini ones but we'll see if they don't look like someone waded up abc gum (already been chewed, remember that?) and threw it away.

Okay, truth time: do you still love poms or is this trend fading? I still think their hot but what do you think? Let's chat in the comments!

Thursday, June 5, 2014

22 Rad Neon-Dipped DIY Projects


If you're like me, you've probably have been drooling over some of the latest and most popular DIY trends. Between gold dots (well, gold anything), ombre, teal, tassels, typography...there's so much goodness our heads are spinning. One big one that I didn't think I'd like but I actually fell head over heels for is neon. Especially neon dipped!

Neon totally is bringing us back to the 80's but without the crazy hair and grudge music. It's been given a fresh new identity and these project ideas are great inspiration for adding that lovely brightness to our boring non-neon daily lives.

I've gathered some awesome resources to spark that creative mind of yours! It was a lot harder than I thought to round up 22 neon-dipped DIY project ideas but here they are. It reminded me that I have a tutorial for up-cycling old utensils by paint dipping them...off to look for those photos for a future post! Enjoy your weekend, beauties xoxo

http://smäm.se/created at: 06/27/2012


http://inspiration.kenmore.com/2013/07/easy-hostess-gift-how-to-make-paint-dipped-spoon-sets


Dip-Dyed-Tassel-Garland-from-The-Minimalist

DIY Neon Dipped Plant Pots


http://www.madiganmade.com/2013/04/neon-dipped-diy-tote-bag.html

DIY neon candles

http://www.mamamiss.com/2012/07/24/home-diy-neon-dinos/

http://urzadzamynaszem.blogspot.com/2013/10/diy-neon-porcelain-jug.html

http://www.brit.co/color-dipped-stools/?utm_campaign=pinbutton_hover
http://www.bloglovin.com/frame?post=2724889117&group=0&frame_type=a&blog=3332522&frame=1&click=0&user=0

http://www.petitapetitandfamily.com/2013/06/bringing-home-my-diy-neon-shoes.html

pink toe neon shoes DIY

Neon Paint Dipped Pumpkins | #neon #paintdipped #pumpkins #halloween #fall #MPumpkins

diy-neon-pink-and-navy-blue-vase

dipped wooden bowls

http://www.lebenslustiger.com/serendipity/archives/107-Dip-into-Easter.html

http://art-actually.blogspot.com/2013/04/a-pop-of-neon.html

http://blog.modernfrills.com/crafty-neon-party-spoons/

http://www.designsponge.com/2012/05/before-after-two-dip-dyed-side-table-redos.html

http://www.dezeen.com/2010/01/13/e8-table-by-mathias-hahn/

What's your opinion about the neon trend? Yay or nay?
I'd love to know your thoughts in the comments!

Thursday, May 8, 2014

Pinterest Inspiration Board: Coral + Gold


For the love of gold, look at it! Coral and gold are the two hottest colors right now and honestly, I don't like to jump onto bandwagons but my goodness these colors rock.It took me a while to warm up to coral because I never thought of it as a real color haha You know, it was just like a pretty accent here or there but never really the focus. So I'd love to open this board up as a group board so you beauties can pin to it and find inspiration in one place! Pinterest group boards are a great way to build community, bring traffic to your site or blog and gain Pinterest followers.

If you're interested in becoming a group member for this board, just leave your email address in the comments below! I'll send you an invitation to join the board and start pinning away.

Don't forget to click on the widget above for more beautiful Coral + Gold inspiration!
Just for fun, here are two Pinterest group boards I'm part of.

Blog Tour started by +Happy Wives Club :
http://www.pinterest.com/happywivesclub/blog-tour/

Contributor Board started by +Melanie Salinas :
http://www.pinterest.com/mommymentions/contributor-board/

Are you a member of any group boards?

Friday, February 7, 2014

Kid Craft: Valentine Bird Feeder Mobile


Yay, happy Friday beauties!!
I still love Fridays even though I stay at home with my boy. There is just something about the day before the weekend that is exciting, no matter if you go to school, stay home, work at home or go to work. The sun is shining too which always puts a little pep in my step!

Today I'm sharing with you a lovely craft David and I did last week. It's super cute, fun and kind of messy. Which actually surprised me but that's probably because I don't have much experience making bird feeders. This activity taught me a lot about how to handle projects with sticky materials and little grabby hands.


The photo above highlights what you will need but I did use string instead of the red ribbon in the end. It's fairly easy though and there are lots of aspects that encourage children to use their senses. Colorful scrap fabric draws the attention of the eyes. Amazing textures like hard bark on the twig, rough paper and silky ribbon or rope. The smell of mixed trail mix and sap on the pine cones. Don't forget the peanut butter! Of course, they have to taste it first before crafting. It's like the unspoken rule of having peanut butter around.

Here's what you'll need:
- Scraps of fabric
- Twig
- 2-4 pine cones
- Bag of trail mix
- Peanut butter
- Ribbon or string
- Red paper
- Scissors
- Tape


First, I let David take a large spoon and break up the trail mix a little. He had fun pounding the bag and was very intrigued with looking at the contents, squishing the bag in his hands. While your kiddo is busy doing that, tie the string to the top of the pine cones and scoop out some peanut butter on a paper plate. I don't have pictures of the process because I try to enjoy the moment. Plus the added pressure to take pictures, for me, takes away some of the interactive fun between my son and I.

Next, let them roll the pine cones in the peanut butter and either dip them into the bag or dump the trail mix on a paper plate and roll the pine cones in it. The smaller the trail mix pieces, the better! While they are doing that, cut out a few small heart shaped pieces from the red paper.


Then, have them wrap the scrap fabric around the twig or help them do it. This part David loved (besides eating the peanut butter) because he liked holding the twig and watching me spin the fabric around it. He also would spin the twig while I held the fabric still. Tie the ends of the fabric to the twig. We did a few different kinds of fabric, inter-lapping and weaving them. Be creative!


Lastly, tie pieces of string to the twig and tape the hearts to it. I used tape because I didn't want to fuss with glue on top of the peanut butter; that would've been a yucky surprise should David think it was a snack! He did like helping me tape the hearts to the string. Next time though, we will use glue or a double stick tape. Attach two long piece of string on either sides of the twig to be used for hanging.

Finish the mobile off by attaching the pine cones and wala! Time to hang and watch the birds flock! Or in our case, witness the calculated destruction our neighborhood squirrels provoked as they demolished our beautiful masterpiece and stole those luscious pine cones.

In the end, it really wasn't about feeding the birds anyway. This craft is a fun, interactive learning tool for any child at any age. Plus adding hearts helps it become all Valentine-y and stuff. Personalize it to your kiddo and go at it! Just make sure you have extra peanut butter and nuts for your little sweetheart.

Have you been doing any Valentine themed kiddo crafts lately? Honestly, I hardly ever do themed crafts geared towards the Holidays but I felt led this time. Check out these mini hearts and arrows pancakes David helped me create as a perfect Valentine breakfast for kids that morning!

Thursday, September 12, 2013

DIY Fall Kid Craft: Handprint Wreath


I don't know why but this season really hit me that my baby is no longer a baby. Maybe it's all the running around that goes on in my house. And yeah, I'm talking about me. Running here to get him out of a drawer or running there to direct him away from climbing the stairs. Phew, if you want a good workout, have a toddler!

An amazing new thing is how much fun we have doing crafts. I'm starting to document them more on the blog since I don't want to forget all the fun things we do and I really want to share them with other mommies. At 16 months, he can interact more while doing handy crafts which is so entertaining, rather than trying to do a craft with a newborn: which means they breastfeed while you stamp their foot to a piece of paper.


You only need a few things for this craft and you probably already have them in your home!
Here are the basics:

- 2 sheets of cardstock, different colors or patterns
- 2 sheets of construction paper, different colors
- Glue stick or tape
- Crayons
- Scissors
- 8x8 inch piece of cardboard
- Piece of twine
- a child, preferably your own

That last one is just to be sure. Unless you're a sister, aunt or grandmother. Other than that, things can get creepy.


Take the construction paper and let the littler guy or gal to doodle their heart out with the crayons. Show them how to write their name or let them do it if they are older. Make this part a small craft on it's own, because technically, this is the only part they do! After they get their Picasso on, simply turn the sheet around and trace their handprint on the back. Cut out the handprint and use it as a stencil for the rest of the hands. Cut out about 12, or 2-3 handprints per sheet of cardstock and construction paper. 


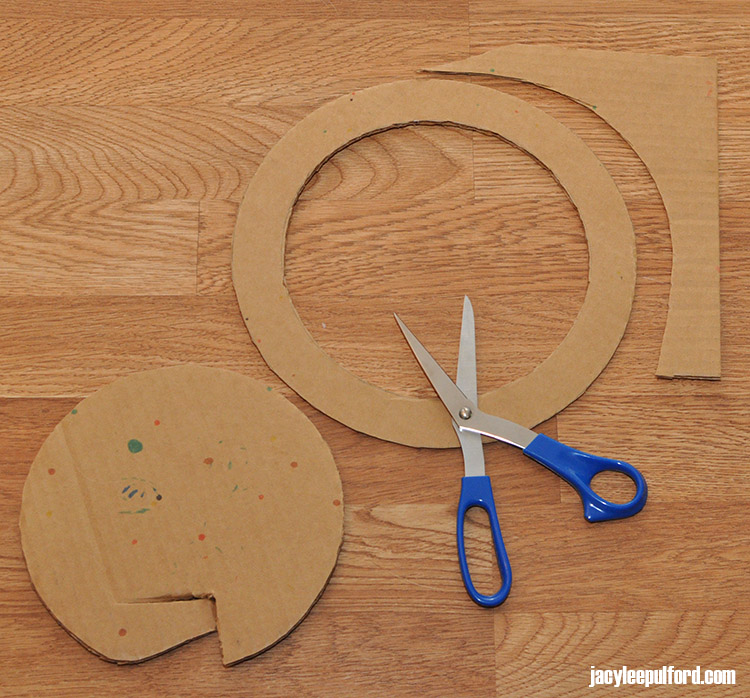
Use a small and medium plate to trace circles onto the cardboard, one for the outer line and one for the inner line. It should make a good size ring shape. Cut out the ring shape.

Glue or tape your little one's handprints on one side. You'd want to "fan" them out like leaves or feathers, making sure they hide the cardboard. Turn the wreath around so that the cardboard is face up. Measure a length of twine about 3 inches long and string it across the top, only taping at the ends. This will be how you hang the wreath...like...


...tada! I was so excited to add this to my dining room plate wall! Yellow and orange are part of my decor colors so the wreath blended right in. Of course, it's just so touching to see his sweet hands decorating the wall. It's going to make a great addition to my fall decor and an even better keepsake for him later on.

Have you added any kid crafts to your decor?

Related Posts Plugin for WordPress, Blogger...
Blogging tips