Showing posts with label home decor. Show all posts

Friday, February 13, 2015

5 Ways To Decorate On A Budget


Hey Guyssss!  I'm Michelle and you can catch me blogging over at Let It Shine.  I blog mostly about my life, sometimes about my projects, crafts, recipes and sewing.  Mostly sewing.  I love it like serious.  Other things I love like serious?  My kids, my husband, being a Christian, and beautiful things.  Oh, and my favorite color is gold.  So now that we are properly introduced, let's talk about decorating!

If you've visited my blog, you have probably heard me mention a few times about us moving into a new rental.  We LOVE it here.  It's a ranch style house which is kind of a treasure in this area of Virginia.  The kids have bigger  bedrooms, we have a bigger kitchen, and we also have a little foyer and a HUGE living room area...at least huge compared to what we used to have.  And the summation of all this is, I finally have room to decorate in this home!  At our last house I always felt stifled by the tiny amount of space and to be honest, decorating just seemed like a waste when there was really nothing to decorate.

We are so blessed to have this new home for however long we'll have it.  I'd love to paint and I can't even imagine how crazy I'll go when we finally purchase a home, but for now I am so thankful to have a space to decorate.  But, as with everything else in my life, I'm definitely having to do that on a budget.  So here are my best five tips for decorating on a budget.  I really believe that even those with the smallest wallets can find some good tips here so keep reading!

1. Plants/Flowers.
Little plants and flowers are so pretty and can be very colorful!  I have bought several small (fake) plants and flowers.  What I have I purchased at Ikea, Hobby Lobby and Michaels.  You can find small, very inexpensive vases (I typically spend $3-5) at some of the same stores.  It's even easy and cheap to switch out the flowers every few months so they match up with the seasons.


Plater/Plate: Ikea

Milk Jar: Hobby Lobby//Flowers: Michaels

Vase: Ikea//Flowers: Michaels

2. Use Facebook to Decorate!
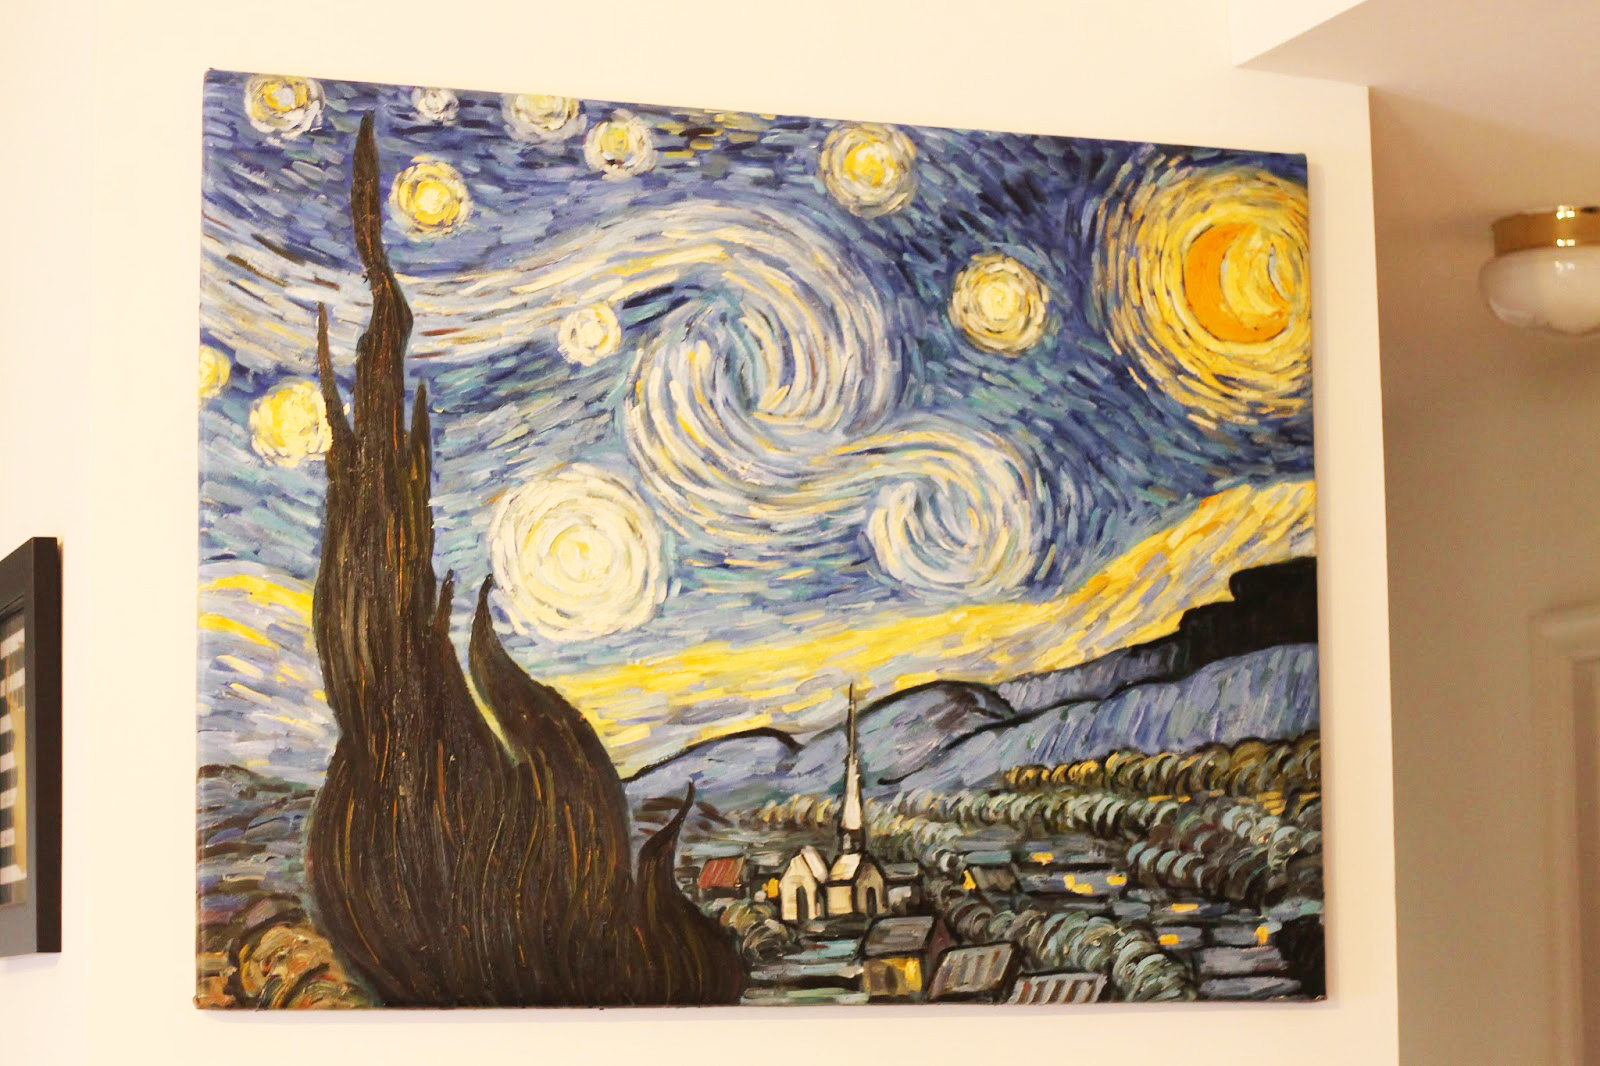
For those of you who want to have a more cultured look, try some art!  I found this amazing piece on Facebook for $15 and I think I was the complete envy of my Van Gogh loving friend.  Similar pieces sell at art stores for $200 + but since I found this on a Facebook yard sale site I paid literally a fraction of that price.  If you haven't already, search "Your city + Yard Sale" on FB and see what pops up.  I would pick the group/fan page with the most members for the results with the most variety.  Or ask to join several groups.  Most will let you post "ISO" (In Search Of) and just try asking to see what people have that they are willing to sell.  You could also try Craigslist.  As always, please be super careful when meeting with strangers.  Always meet in public!  If you don't like the idea of using the internet, try your local thrift stores or even go to garage sales.


3. DIY
If you are wanting to show your creative side, there are some awesome projects you can do yourself that will be quite the statement piece.  I got the idea to make this fabric map from Pinterest and there is another project from Pinterest I'm wanting to do too.  It's no secret that I sew, and though these projects require fabric, they actually don't require a sewing machine or any sewing at all.  You can use iron on transfer paper to make these beautiful projects.  All you need is the paper (at your local craft store, or even Walmart sells this) and an iron.  And fabric, of course!  Easy peasy lemon squeezy.

Similar Map Tutorial here.  Rainbow Row wall hanging: vintage.

4. Printables. 
Printable art has become quite popular over the last few years.  There are so many free options on Pinterest.  I have searched many times for specific things and have been able to find most of them for free.  Etsy has a lot of great options for printables too and the customizable options are basically limitless.  Sites like (my ever favorite) Groopdealz and Brickyard Buffalo often offer cute printables at steeply discounted prices.  And if none of that fancies you, try using a site like PicMonkey to make your own!  I have made several printables on display in my home right now.


5. Garland.  
Garland is a great idea for easy, inexpensive decor.  They can be hung over doorways, on mantles, on entertainment centers, on a kitchen bar, even on a bare stretch of wall.  You can make them with tissue paper, tassels, fabric scraps, burlap, pom poms and that's not even all of your options!  You can buy garlands for fairly cheap at stores like Target or Hobby Lobby or you can make your own with supplies you can buy at a local fabric or craft store.  Search Pinterest for tutorials on the specific kind you're interested in to get you started.

Heart Garland: Target (only $3!)

Red Rag Garland: Gift

And just so you know, guys, the lighting in my living room was fairly terrible when I took these photos.  My heart was sad, but hey, you win some you lose some.  Overall, I feel like the decor is a win.  Happy Decorating!

Michelle is a sewing mama of two in love with photography, fabric, anything sparkly and chevron, DIY projects and silliness. She can be found blogging here and on Instagram here.

Tuesday, July 15, 2014

DIY Kitchen Palette Shelf


There's this area right across the street from our church where people pile stuff they don't want. The last time was this amazing table we picked up for our son's train set. As we were driving away from church a few weeks ago, I noticed a couple of palettes on the side of the road. Holla!

It took me a few weeks to decide that I needed a palette shelf. So with the help of my handy husband, here's how to create one for yourself!

You'll need:
Palette (duh)
Pencil
Saw
Nail gun or hammer and nails
Sandpaper (optional)
Drill and screws


I planned out how I wanted the shelf to look and where the cuts should be. The top photo shows where to cut with the saw. Use a pencil to mark the wood. Use the saw to cut along those lines. Here's an easy overview: Count two rows of palette boards down and cut across the left and center vertical boards. On the right side of the center board, cut all the way down, both top boards and bottom boards.


You'll have extra boards left over, which no complaints there right? Choose two of the extra boards and secure them as the shelf bottoms with the nail gun. Also, most palettes have old nails so make sure to add some new ones for support all over.


Hanging up your palette can be done a number of ways. I encourage you to find a way that works for you. My husband used the stud finder and just drilled it right to the wall. I was totally fine with that.

Before, that wall was okay but now it's a piece of art! I loved the wood look but it can be sanded and painted too. We have plans on making this corner a coffee and tea area. I'm even more excited to see it decorated in cute white mugs and maybe a witty sign from the shop!

Okay, now be honest. Are you sick of palette projects/items yet or is it still a hot trend? 'Cuz we just got a truck load (not kidding, like 14 to be exact) of palettes sitting in our garage right now and we're drooling over the possibilities.


Thursday, June 5, 2014

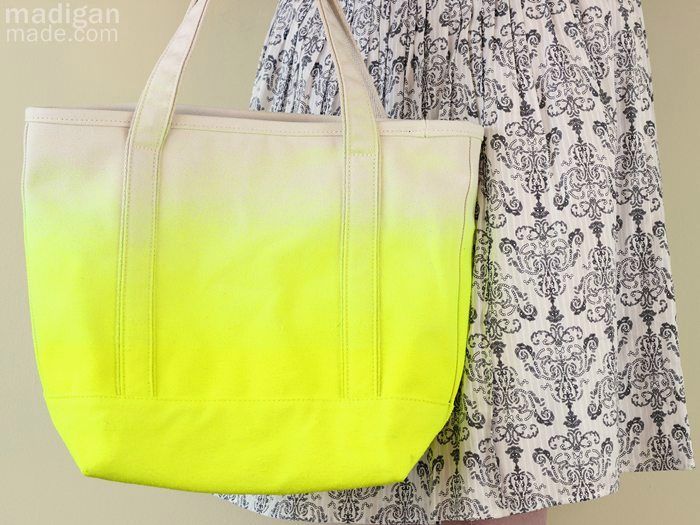
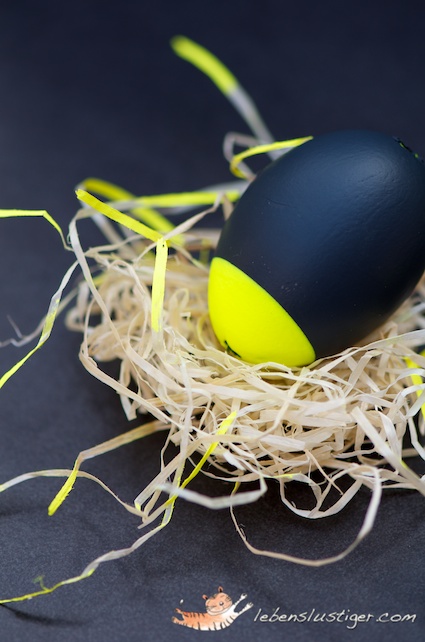
22 Rad Neon-Dipped DIY Projects


If you're like me, you've probably have been drooling over some of the latest and most popular DIY trends. Between gold dots (well, gold anything), ombre, teal, tassels, typography...there's so much goodness our heads are spinning. One big one that I didn't think I'd like but I actually fell head over heels for is neon. Especially neon dipped!

Neon totally is bringing us back to the 80's but without the crazy hair and grudge music. It's been given a fresh new identity and these project ideas are great inspiration for adding that lovely brightness to our boring non-neon daily lives.

I've gathered some awesome resources to spark that creative mind of yours! It was a lot harder than I thought to round up 22 neon-dipped DIY project ideas but here they are. It reminded me that I have a tutorial for up-cycling old utensils by paint dipping them...off to look for those photos for a future post! Enjoy your weekend, beauties xoxo

http://smäm.se/created at: 06/27/2012


http://inspiration.kenmore.com/2013/07/easy-hostess-gift-how-to-make-paint-dipped-spoon-sets


Dip-Dyed-Tassel-Garland-from-The-Minimalist

DIY Neon Dipped Plant Pots


http://www.madiganmade.com/2013/04/neon-dipped-diy-tote-bag.html

DIY neon candles

http://www.mamamiss.com/2012/07/24/home-diy-neon-dinos/

http://urzadzamynaszem.blogspot.com/2013/10/diy-neon-porcelain-jug.html

http://www.brit.co/color-dipped-stools/?utm_campaign=pinbutton_hover
http://www.bloglovin.com/frame?post=2724889117&group=0&frame_type=a&blog=3332522&frame=1&click=0&user=0

http://www.petitapetitandfamily.com/2013/06/bringing-home-my-diy-neon-shoes.html

pink toe neon shoes DIY

Neon Paint Dipped Pumpkins | #neon #paintdipped #pumpkins #halloween #fall #MPumpkins

diy-neon-pink-and-navy-blue-vase

dipped wooden bowls

http://www.lebenslustiger.com/serendipity/archives/107-Dip-into-Easter.html

http://art-actually.blogspot.com/2013/04/a-pop-of-neon.html

http://blog.modernfrills.com/crafty-neon-party-spoons/

http://www.designsponge.com/2012/05/before-after-two-dip-dyed-side-table-redos.html

http://www.dezeen.com/2010/01/13/e8-table-by-mathias-hahn/

What's your opinion about the neon trend? Yay or nay?
I'd love to know your thoughts in the comments!

Thursday, May 29, 2014

DIY No-Sew Skirt to Pillow Tutorial


Wow, it's been a long time since I've put together a tutorial for the blog! Let's change that. I've been working on some pretty cool stuff for the condo. You might remember this post when I shared all the DIY sneak peeks from our Master Bedroom Redo. To be honest, I'm terrible at remembering to take photos as I go when the creative crafty bug bites. I just want to see my idea come alive and be done. So I might have to actually draw some pictures instead of showing real photos for future tutorials...wouldn't that be a neat change? Hm, idea noted.

Today I'm going to share with you a ridiculously easy pillow tutorial using an old skirt! It's really so easy, you might get sick. So stop reading now and grab a bin. Things might get dicey (whatever that means. I just know cool people say it. Well, not anymore.)


Here's what you'll need:
  • pillow
  • old skirt
  • scissors (optional. I actually didn't use mine, ha!)
  • safety pins (important though not pictured. blogger fail.)
  • paint
  • brush
  • white pencil (optional.)

First, make sure your skirt is the same size or slightly larger than the pillow. You basically want the skirt to be a cover. A really skilled person with a sewing machine might undo all the seams, create a pattern and fit the pillow properly. Luckily, I'm impatient and though I have a sewing machine, I avoid it like the plague. All I did for this step was slip that bad boy into the skirt like I was dressing a mannequin. Worked for me.


Once the skirt is on the pillow, use the safety pins to secure the seams of the skirt. For the ends of the pillow, fold the two corners like an envelope (top left photo). Then lift up the middle flap, fold it over and pin on the inside of the edge (bottom photo). It will take some work to hide the pin if you wanted it hidden. Once you fold, tuck and pin the pillow is finished and ready for decorating! Do this for both sides. Note: my old skirt had a slit in the back. I just used the same tuck and pin method, folding the fabric enough that the pillow was completely covered.

I wanted a little script action in the center of the pillow so I decided to use the Spanish phrase "te amo" or "I love you." Being Puerto Rican and that the pillow is going in our bedroom, I thought it would be a sweet touch.  Use a white pencil to create guidelines or wing it. Either way, have fun!


Now sit back and enjoy your beautiful handy work! A couple of reasons why I chose this method:
  1. Um, it's crazy easy.
  2. I had everything on hand
  3. The pins come right out and the skirt cover can be thrown in the wash
Warning: you may not want to make this pillow for a children's room. At least, don't use this method. I knew this pillow was going to be more for show when I dress the bed and not really for lounging. If it were to be used more, well, like a real pillow then I would probably sew it. Probably.

Have you ever thought of upcycling old clothes into home decor items? I want to make more!

Related Posts Plugin for WordPress, Blogger...
Blogging tips